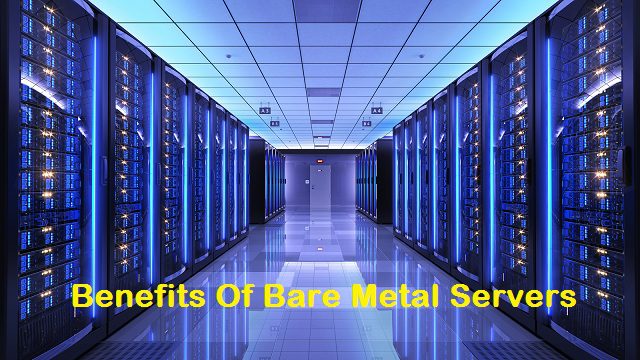
Whether your business requires massive databases, game servers, rendering, software development, Bare metal servers are the ultimate tool for businesses in need of high-performance, customizable, and secure servers. These single-tenant machines provide users with total access to the hardware, allowing for full control over the server’s configuration. Unlike virtual machines (VMs) which use a hypervisor layer, the operating system is loaded straight onto the server, resulting in some of the most high-performance servers on the market.
The benefits of bare metal servers are numerous. Firstly, they offer a level of flexibility and customization that VMs cannot match. With bare metal servers, businesses have the ability to configure the processor, memory (unshared), and storage to their specific needs. VMs, on the other hand, are limited by the provider’s control over the hardware.
Another advantage of bare metal servers is their ability to provide stable performance. As the hardware is powering the applications and web hosting solely, the performance is not affected by other users or virtual machines. Furthermore, bare metal servers come equipped with high-spec processors, RAM, NVMe solid-state drives, and other hardware products that dedicated servers do not come with.
Bare metal servers are also a subset of Infrastructure as a Service (IaaS), but they offer different service levels. While IaaS utilizes virtual resources, bare metal servers use dedicated servers. This means that businesses have control over the infrastructure, allowing them to install VMs and hypervisors as they wish.

Benefits Of Bare Metal Servers
7 Benefits of Bare Metal Servers
• High-performance servers: With bare metal servers, the operating system is loaded directly onto the server, eliminating the need for layers and resulting in some of the most high-performance servers on the market.
• Flexible configuration: Bare metal servers allow users to configure the processor, memory, and storage to their specific needs, unlike virtual machines (VMs) where the provider controls the hardware.
• Stable performance: Both bare metal and dedicated servers provide users with stable performance as the hardware is powering their applications and web hosting solely.
• High-spec hardware: Bare metal servers come with high-spec processors, RAM, NVMe solid-state drives, and other high-end hardware products that dedicated servers do not offer.
• Infrastructure control: Unlike Infrastructure-as-a-Service (IaaS) which does not afford any infrastructure control, bare metal servers allow businesses to configure a dedicated server in the fashion they choose and install VMs and hypervisors as desired.
• Cost-effective: Bare metal servers offer extremely flexible billing options and allow businesses to keep hold of their capital by only paying for the time they use the servers.
• Compliance and security: Bare metal servers provide a single-tenant environment, addressing compliance and security issues better than VMs, and providing improved application and data performance while maintaining high-level security.
In terms of cost, bare-metal servers offer organizations extremely flexible billing options. Businesses only pay for the time they use them and many providers even offer a pay-by-the-hour option. This is a much more cost-effective option than purchasing servers outright, which involves a capital outlay and the risk of purchasing the wrong hardware or specifications.
Bare metal servers also address compliance and security issues better than VMs. The single-tenant environment provides an improved application and data performance while maintaining high-level security. As there is no virtualization, there is no overhead for a hypervisor, resulting in better performance.

Have you ever seen a padlock icon together with the URL of the website you’re visiting? We’re sure that you have. But do you know what the padlock icon signifies? It signifies that the website you’re visiting is protected by an SSL certificate.
Now, you’re probably thinking things like what is an SSL certificate or how does an SSL certificate work. To help you get answers to these and other questions, we’ve created this ultimate guide. After reading this piece, you should have a clear idea of all things related to SSL certificates.
So, let’s get started.
What Is an SSL Certificate?
SSL is the abbreviation for “Secure Sockets Layer,” which is a security protocol that establishes an encrypted connection between a web browser and a web server.
SSL protocol was first introduced in 1994 by Netscape. The objective was to secure online transactions made using their Navigator browser.
Basically, an SSL certificate refers to a digital certificate that acts as an authentication of the identity of a website. Companies and businesses that want to enable this encrypted connection need to add an SSL certificate to their websites so that they can keep their customers’ information secure and private. Websites with SSL certificates also facilitate secure online transactions.
These days, SSL certificates are commonly used to secure data transfer, logins, online transactions, and browsing of social media platforms. SSL helps to maintain secure Internet connections and protects information, which is being transferred between two systems, from being read or modified by criminals.
When a web server is equipped with an SSL certificate, the HTTPS protocol and the padlock get activated and secure connections from the server to a browser are created.
An SSL certificate binds several things together. These include:
- An organizational identity (such as the company’s name) and location
- A domain name, hostname, or server name
A business or organization can initiate secure sessions between its web server and browsers by adding an SSL certificate to its server.
When an SSL certificate is properly installed on a web server, the application protocol (commonly known as HTTP) becomes HTTPS. Here, the “S” refers to “secure.”
Although once there were multiple versions of SSL protocol available, all of them experienced security hazards at some point. However, these days, we use a more secure, advanced version of SSL, which is known as TLS or “Transport Layer Security.”
When you buy an SSL certificate, you actually buy a TLS certificate. Since SSL is a more widely used term, sellers still refer to the certificates as SSL certificates.
How Does an SSL Certificate Work?
Now that you’ve got a clear idea of what is an SSL certificate, let’s try to understand how does an SSL certificate work?
The key objective of using an SSL certificate is to ensure that all data transferred between two systems, or between websites and users, cannot be read by any means. An SSL certificate achieves this through the use of public key cryptography.
Two long strings (known as keys) of random numbers are mainly used in this specific kind of cryptography. One key is called a public key and the other one is known as a private key.
The server remains aware of the public key and it can be found in the public domain. Any message can be encrypted using a public key. Let’s consider an example to get a clear understanding of the roles of these keys.
A sends a message to B and locks it using the public key of B. However, if anybody wants to decrypt that message, they must have the private key of B. Since B is the only person who has this private key, B can only unlock A’s message.
If the message is intercepted by a hacker before it gets unlocked by B, they get nothing but a cryptographic code that cannot be broken by any means.
Here’s the working method of the process.
- A server or browser tries to connect to a web server (i.e. a website) that has an SSL certificate.
- The server or browser requests that the web server proves its identity.
- In response, the web server sends the server or browser its SSL certificate’s copy.
- The server or browser verifies if the SSL certificate can be trusted. If it’s a yes, the web server receives a signal from the server or browser.
- Then a digitally signed acknowledgment is returned by the web server to begin a session encrypted by SSL.
- Encrypted data starts to flow between the web server and the server or browser.
Sometimes, this process is called an “SSL handshake.” Although it may seem to be a lengthy process, it actually occurs in milliseconds.
How to View the Details of an SSL Certificate?
As mentioned above, when an SSL certificate protects a website, a padlock icon becomes visible in its URL address bar. This provides an assurance and indicates trust to the site’s visitors.
You only need to click on the padlock icon to view the details of the SSL certificate. An SSL certificate typically includes the following details:
- The website name for which the SSL certificate was issued for
- The device, person, or organization to which it was issued to
- Name of the issuing Certificate Authority
- Digital signature of the Certificate Authority
- Subdomains associated with the main domain
- The date when the certificate was issued
- The date when the certificate will expire
- The public key while the private key remains hidden
Why Is an SSL Certificate Required?
So far, we’ve been discussing different aspects of an SSL certificate. Now, you’re probably thinking about the main thing, “why do I need an SSL certificate?”
SSL certificates help websites maintain the security of their user data, establish their ownership, protect them from having fake versions created by hackers, and build trust among their users.
For instance, if a website requires you to sign in, enter your personal details like your credit card number, or review your confidential information like your financial information or health benefits, then it has to maintain the confidentiality of your data.
If the site is secured with an SSL certificate, you can stay assured that it’s safe and authentic and you can share your personal information with it. An SSL certificate also guarantees that all your online interactions remain private.
We’ve already discussed that when an SSL certificate protects a website, the HTTP is shown as HTTPS. The majority of browsers display HTTP sites, which don’t have SSL certificates, as “not secure.” This clearly indicates that those sites may not be trustworthy. This also compels businesses that don’t have SSL certificates to buy them and become secure.
With an SSL certificate, you can secure the following types of information:
- Bank account information
- Details of credit card transactions
- Login credentials
- Personally identifiable information. These include your full name, address, contact number, date of birth, etc.
- Proprietary information
- Medical records
- Legal contracts and documents
What Are the Different Types of SSL Certificates?
After getting the answer to the question, “why do you need an SSL certificate,” the thought that should come to your mind is which type of SSL certificate you should buy.
You can choose from different types of SSL certificates based on the validation level you need. Mainly, six types of SSL certificates are available in the market. These include:
- EV SSL or Extended Validation certificates
- OV SSL or Organization Validated certificates
- DV SSL or Domain Validated certificates
- MDC or Multi-Domain SSL certificates
- UCC or Unified Communications certificates
- Wildcard SSL certificates
Let’s see what each of these entails.
EV SSL or Extended Validation Certificates
This is the costliest and highest-ranking type of SSL certificate. High-profile websites that facilitate online payments and collect personal information tend to use EV SSL certificates. When you install an EV SSL certificate, it displays HTTPS, the padlock, the name of your business, and your country on the address bar of the browser.
When your website displays your information on the address bar, your users can easily distinguish it from other harmful or fake sites. If you want to install an EV SSL certificate, you’ve to complete a standardized identity verification process to prove that you have legal authorization for the domain’s exclusive rights.
OV SSL or Organization Validated Certificates
These types of SSL certificates come with an assurance level similar to the Extended Validation certificates. This is because site owners must complete a thorough validation process to install an OV SSL certificate. If you install an OV SSL certificate, it displays your information on the browser’s address bar so that your users can distinguish it from malicious sites.
The primary objective of using an OV SSL certificate is to encrypt sensitive information of the user during transactions. This is also the second costliest type of SSL certificate (after EV SSL). If you run a public-facing or commercial website, it must be secured with an OV SSL certificate to make sure that information shared by your customers remains confidential.
DV SSL or Domain Validated Certificates
DV SSL certificates provide minimal encryption and a lower level of assurance. This is because if you want to install a DV SSL certificate, you need to complete a minimal validation process. This type of SSL certificate is ideal for information websites, blogs, or sites that don’t facilitate online transactions or collect personal information.
DV SSL certificates are the fastest to obtain and one of the cheapest ones. During the validation process, you only need to establish your domain ownership by responding to a phone call or email. Once installed, the browser address bar just displays the padlock icon and HTTPS without any business name or other details.
MDC or Multi-Domain SSL Certificates
If you want to secure multiple subdomains and/or domains, you can use a multi-domain SSL certificate. You may use a mix of completely unique subdomains with different Top-Level Domains (TLDs) except for internal/local ones and domains.
Some examples include:
- org
- everything.com.ca
- ABCdomain.net
- example.com
It’s important to note that multi-domain SSL certificates don’t automatically support subdomains. If you want to secure both example.org and www.example.org using one multi-domain certificate, then you need to specify both hostnames when purchasing the certificate.
UCC or Unified Communications Certificates
These types of SSL certificates are also viewed as multi-domain SSL certificates. Unified Communications certificates were primarily designed to secure Live Communications and Microsoft Exchange servers.
These days, these certificates can be used to secure multiple domain names using a single SSL certificate. These are organizationally validated and after installation, they display a padlock icon on the browser. You can also use UCCs as EV SSL certificates so that your site visitors get the highest level of assurance by seeing the address bar.
Wildcard SSL Certificates
If securing a base domain along with unlimited subdomains using a single SSL certificate is your primary objective, you can use a Wildcard SSL certificate. Therefore, if you want to secure multiple subdomains, then purchasing a single Wildcard SSL certificate will be less expensive than purchasing individual SSL certificates to secure each of them.
Wildcard SSL certificates display an asterisk sign (*) to signify the common name. Here, the asterisk sign represents all valid subdomains that come under the same base domain. For instance, you can use a single Wildcard SSL certificate to secure the following subdomains:
- ABCdomain.com
- ABCdomain.com
- ABCdomain.com
- ABCdomain.com
Before purchasing an SSL certificate, be sure to get familiar with all these types of SSL certificates to make an informed decision.
Closing Thoughts
Considering the increasing number of cyberattacks, it has become a must to secure your site using an appropriate SSL certificate. Now that you know what is an SSL certificate, how does an SSL certificate work, why you need an SSL certificate, and the different types of SSL certificates, go ahead and start securing your site right away.

SSH or Secure Shell refers to a network communication protocol that can be used to access a computer securely over an unsecured network. Apart from providing secure access, network administrators commonly use SSH to manage applications and systems remotely.
SSH protocol can also be used for other purposes such as for transferring files between machines remotely and securely, creating secured TCP tunnels over it, etc.
It’s always a good idea to change the default SSH port because it’s frequently targeted by automated bots and hackers for vulnerabilities. Now, if you’re thinking “how can I change my SSH port,” this guide is here to help.
Before we delve deeper into the process of how to change the SSH server port number, you should note that this isn’t a concrete solution that can protect your SSH service from getting attacked by a knowledgeable hacker.
It’s just a measure to protect your SSH service from hackers and automated bots continuously scanning the IP space searching for default SSH ports being open.
The default SSH port is 22. Since provides full access to the OS of your server, hackers frequently target it more than any other port. By changing the default SSH port you can prevent automated attacks that don’t have the time to check other ports when attacking a Linux server.
Let’s see the answer to your primary question, “how can I change my SSH port.”
How to Change the SSH Server Port Number?
The prerequisite for the process of how to change the SSH port on Linux is having root access to your Linux server.
Here’re the steps involved in the process of how to change the SSH server port number.
Step #1: Connect Using SSH
First, you need to log in to your Linux server via SSH using your root access privileges. This can be done by entering the following command.
sshroot@Server_IP_Address -p Port_Number
In case you aren’t using the root user, be sure to type your username in the place of “root.” Additionally, replace, Port_Number and Server_IP_Address with your actual SSH port number and IP address. If you’ve never modified the port number, this should be 22.
This was the first step in the answer to your question, “how can I change my SSH port.” Let’s proceed to the subsequent step.
Step #2: Choose a New Port Number
Prior to modifying the default SSH port, you need to choose a new port for the SSH to listen on. You can choose any unused port. When it comes to Linux, port numbers lower than 1024 are used by well-known services and hence, can be discovered more easily. Therefore, it’s advisable to choose a port number higher than 1024. The maximum port number that you can setup for SSH is 65535.
In this guide, we’ll change the default SSH port number to 34627.
Step #3: Configure Your Firewall
Before you change the default SSH port, you need to configure your firewall on the server so that traffic can be allowed on your new SSH port.
If you’re using a Fedora/RHEL/CentOS-based operating system, your new SSH port 34627 can be opened with the “firewall-cmd” command.
firewall-cmd –permanent –zone=public –add-port=34627/tcp
firewall-cmd –reload
If you’re using a Debian/Ubuntu-based operating system, your new port 34627 can be opened with the “ufw” command.
ufw allow 34627/tcp
ufw reload
Once this is done, your server can allow traffic on your new SSH port.
Step #4: Modify the Default SSH Port
The default SSH port can be modified by editing the “/etc/ssh/sshd_config” file.
nano /etc/ssh/sshd_config
Look for the following line:
# Port 22
Eliminate the pound symbol “#” to uncomment the line and replace it with this line:
Port 34627
When you’re done, save and close the file. Then, you need to restart the SSH service so that the changes can be applied. Use the following command to do it.
systemct| restart ssh
Now, you need to verify the new SSH listening port using the following command:
netstat -plntu | grep34627
If you’ve correctly completed all the steps of how to change the SSH server port number that we’ve discussed so far, the below output should be seen on your screen.
tcp 0 0 0.0.0.0:34627 0.0.0.0:* LISTEN 1722/sshd
tcp6 0 0 :::34627 :::* LISTEN 1722/sshd
Step #5: Connect To SSH Via the New Port
Now, you need to log out from your present SSH session and reconnect your server using the new port.
ssh -p 34627 root@Server_IP_Address
If there’s no issue, you should be able to connect to your server and receive a password prompt.
So, this was the answer to your question, “how can I change my SSH port.” Just follow these simple steps and you should be able to successfully change the default SSH port number on your Linux server.

There are lots of people who do various online activities without knowing anything about the IP address. However, in this era of increasing cybercrimes, every online user should have a clear idea of it as it’ll help them have a safe online experience.
After reading this far, if you’re wondering what is my IP, this guide is for you. Here, we’ll discuss every important thing related to the IP address. Whether you’re thinking about what is my IP address, how to find my IP address, or what is my IP location, this guide will answer them all and more.
Lets’ get started with the basics!
Understanding an IP Address?
Before we answer your first question, “what is my IP,” it’s important to understand an IP (Internet Protocol) address first.
Basically, an IP address refers to a unique identifier of any device on the web. Your IP address is assigned by your ISP (Internet Service Provider). Your IP address can be used to spot your device among countless others. This is a numeric label (a string of characters) that devices use to communicate with each other when they remain online.
You can think of your IP address as your online home address. This is because it links each of your online activities to your device. Whenever you open a particular website, use an app, or watch a movie online, the website receives your IP address and delivers content to you.
Let’s understand how your device receives content from other websites. First, you enter the name of the website that you want to visit in your browser. Since computers only understand numbers, it first finds out that website’s IP address, then locates it on the Internet, and finally delivers content to your device.
Understanding Different Versions of IP Addresses: IPv4 vs. IPv6
IPv4 and IPv6 are two versions of IP. Let’s see what each of these entails.
- IPv4
IPv4 is the most common version of IP used these days. It uses 32 binary bits, comprising four numbers between 0 and 255. These numbers are separated by dots. An example of IPv4 is 86.103.24.37.
However, IPv4 generates just around 4 billion unique addresses, which is short enough for the present world population. As a result, we’ll soon see the end of the IPv4 address.
- IPv6
IPv6 is the new generation of IP and comprises 8 blocks of numbers. Each block looks like four hexadecimal digits which are separated by colons. An example of IPv6 is 2001:BB40:85a3:0000:8a2e:0000:7334:0001.Number groups that contain only 0 are frequently omitted to save space. In that case, a colon is mentioned to define the gap. Therefore, in this example, the address can be written as 2001:BB40:85a3::8a2e::7334:0001.
Basically, this is longer and can grow further. However, IPv6 isn’t yet as popular as IPv4. There are two key reasons behind this.
First, IPv6 doesn’t have backward compatibility with IPv4. If you use a device that uses an IPv6 protocol, IPv4 websites will be beyond your accessibility.
Second, IPv4 still caters to our needs well. Unless its full potential is reached, we may not see a worldwide shift.
Understanding Different Types of IP Addresses: Private vs. Public Addresses
When you want to know “what is my IP” or “what is my IP address” or “what is my IP location,” you basically try to know your public IP address. To help you get a clear idea, here’re brief overviews of private and public IP addresses.
- Private IP address
A private IP address refers to your device’s IP address that can only be used in local networks such as your home network or your office network. When you’re browsing the Internet, your private IP address remains hidden. Your device cannot send traffic to the Internet using a private IP address.
On a local network, each device is assigned a private IP by the router. This helps devices on the local network find and identify each other. Whenever these devices go online, their private IP addresses become hidden.
- Public IP address
A public IP address refers to your device’s IP address that can be used to identify it on the Internet. Your Internet Service Provider (ISP) assigns a public IP address to your router or device. This is used to establish a connection using the Internet and can be visible to anyone.
Other devices across the world use your public IP address to spot your device and deliver content to it. Since everyone can see your public IP address, keeping it private and safe is important. This is the reason countless Internet users prefer to use a VPN when doing online activities.
Comprehending the Differences between Private and Public IP Addresses
As you’ve probably assumed, the basic difference between private and public IP addresses is the location where they’re used. Your private IP address is only used within your local networks. On the contrary, your public IP address is used to access the Internet and can be seen by anyone. It can also be used to track down your device.
Comprehending Different Types of Public IP Addresses: Static vs. Dynamic Addresses
There are two types of public IP addresses are assigned by Internet Service Providers: static and dynamic. Here’s what you need to know about each of these.
- Static public IP address
Internet Service Providers assign static IP addresses permanently. If your device has a static IP address, it can reveal more precise information about it. An example can be its accurate physical location.
The majority of businesses use static IP addresses so that people can easily find them using the Domain Name Service. However, using a static IP address requires having a stable Internet connection, managing remote networking services, running an email or web server, operating computers and other peripherals properly, etc.
One major downside of using a static IP address is that in case of a security violation, it becomes much easier to trace the physical location of the device with the said IP address. You should also note that ISPs charge more to assign static IP addresses because it requires more manual support.
- Dynamic public IP address
In the case of dynamic public IP addresses, ISPs use a DHCP server that constantly assigns and changes these addresses. A DHCP server is a network server that automatically assigns unutilized IP addresses to devices on the network.
This doesn’t require any manual interference at the user’s end. These addresses are generally easy to manage and ISPs can reuse multiple IP addresses on a network.
There are two key advantages of using a dynamic public IP address. First, they cost lower than static public IP addresses. And second, it’s more difficult to trace a device with a dynamic IP address because it gets changed constantly.
Although businesses and web servers often use static public IP addresses, dynamic ones are more user-friendly. However, it’s important to note that since dynamic public IP addresses change constantly, it becomes more difficult to whitelist several devices and operate them with remote access.
Fundamentally, dynamic IP addresses are more suitable for average consumers than businesses. Whether you use a smartphone, laptop, desktop, tablet, or any other smart device, a dynamic IP address should cater to your needs well.
3G or 4G mobile network providers generally assign dynamic IP addresses. However, you may obtain a static IP address from some of them by paying an additional monthly fee.
What Is My IP?
Now that you know what’s an IP address, it’s time to answer your primary question, “what is my IP.” As mentioned above, your IP address is basically your public IP location. You only need to use an “IP lookup” tool to know your IP address.
What Can Be Revealed By My IP Address?
Your public IP address can be used to trace your identity and location. As noted above, your public IP address is assigned by your Internet Service Provider. And all ISPs have a signed contract with each of their customers where they generally leave their personal information. As a result, ISPs have complete information on which of their IP addresses are being used by which of their customers. Therefore, as long as you’re using a public IP address, it won’t be difficult to spot your identity.
Similarly, your location can be identified using your public IP address. An IP location generally doesn’t reveal a street or building address because an IP address is bounded to a particular location. However, once your location is identified, it won’t take much time for an appropriate agency to find out your accurate physical address.
What Can Happen When Someone Knows My IP Address?
What can be done with my IP address is one of the most common questions we receive these days. If you’re using a static IP address, someone with the right tool and required knowledge can quickly know your personal information like your name and physical address.
Hackers use multiple methods to know your IP address. For example, clicking on a shady online advertisement or link can do the trick quickly. However, it’s important to note that ISPs don’t need to use any of these to track your online activities. Although some unreliable ISPs have a history of selling the personal information of their users to advertisers for monetary gain, this usually doesn’t happen.
But if hackers get to know your IP address, they can hack into your mobile phone or PC, infect your device with virus, or steal your identity.
How Can I Hide My IP Address?
In the last block, we’ve discussed what can happen when your IP address becomes known to hackers. So, let’s see what you can do to hide your IP location. There are four common methods to do it. Here’re brief details of each of them.
- Using a VPN
Using a VPN is generally considered the best method to hide your IP address. When you use a VPN, your real IP address gets masked. And if someone tries to know your IP address, they see the IP address of the VPN server.
Additionally, the VPN encrypts all your traffic making it impossible for others to access it. If your VPN has a no-logs policy, then even the VPN server won’t be able to store or access your information. However, it’s generally advisable to use one of the popular VPNs because they implement multiple layers of security to help their users have a safe and relaxed browsing experience.
- Using a proxy
You can use a proxy to hide your actual IP address but it isn’t the safest option. This is because proxy servers don’t have any encryption process in place, and hence, it’s possible to intercept your traffic. And this may reveal your IP address and browsing history. Moreover, free proxies have a bad track record of selling their users’ information to third parties for the sake of financial gain.
However, if you just want to hide your real IP address and nothing else, you may want to use a proxy server. In that case, you should definitely go with a good, paid proxy server.
- Using the Tor
Tor refers to a freeware browser that can help you bypass geoblocking and hide your online presence. However, Tor is constantly monitored by the authorities because it’s frequently used to access the dark web, where lots of criminal activities happen.
- Using a public Wi-Fi network
Although you can hide your actual IP address by using a public Wi-Fi network, you should always try to avoid it. These networks have several drawbacks that can reveal your personal information to the public.
If you must use a public Wi-Fi network, be sure to use a VPN when doing so. Not only this’ll hide your IP address but encrypt all your traffic as well.
Closing Thoughts
We hope that we’ve successfully answered all your questions, from what is my IP to how to find my IP address and more. The things we’ve discussed above should now enable you to decide how to choose the right IP address and how to protect it from hackers.
Just remember to check your IP address a couple of times a month to ensure it isn’t blacklisted. If it gets blacklisted, immediately contact your ISP as it may hamper your browsing experience.

Is the traffic to your business website getting increased day-by-day? Is your present shared hosting plan failing to serve the needs of your visitors? If yes, perhaps it’s time to switch to a better hosting solution.
If you do some research online, you’ll find that VPS (virtual private server) hosting solutions are considered much more powerful and reliable than shared hosting solutions. And the best thing about VPS hosting is that it comes at a much lower cost than the cost of dedicated server hosting.
In fact, with VPS, you get somewhat similar benefits offered by dedicated server hosting by paying slightly more than shared hosting.
Now the thing is when it comes to VPS, there are two types of solutions available: managed VPS and unmanaged VPS. A lot of website owners get overwhelmed when it comes to managed VPS vs. unmanaged VPS.
With that in mind, we’ve created this ultimate comparison of managed VPS vs. unmanaged VPS. Here, we’ll discuss every important thing you need to know to make an informed decision.
So, let’s get started with the basics.
What Is VPS Hosting?
In a VPS hosting environment, an actual physical server is divided into multiple servers through the use of virtualization technology. Each of these servers has dedicated resources for its users. Therefore, when you choose VPS hosting, whether it’s managed VPS hosting or unmanaged VPS hosting, you get to use those resources exclusively.
So, basically, from the user’s viewpoint, a virtual private server acts much like a dedicated server. If you’re wondering why VPS hosting costs much lesser than dedicated server hosting, the answer lies in how the server is being used by the hosting solution provider.
In VPS hosting, you only get to use one part of an actual server, while in dedicated server hosting, you get to use the entire server.
What Is Managed VPS Hosting?
Now that you’ve got a clear comprehension of what’s VPS, it’s time to delve deeper into the managed VPS vs. unmanaged VPS comparison. However, first, it’s important to know the basics of managed VPS hosting and unmanaged VPS hosting.
Let’s see what managed VPS entails.
Managing a server isn’t an easy task. It requires a significant amount of technical expertise, effort, and time to maintain a server’s top performance. With managed VPS, your hosting service provider is entirely responsible for managing the server. Be it updating its components or protecting it from security vulnerabilities, your hosting provider will take care of every server-related responsibility.
This is one of the biggest reasons a huge number of website owners choose managed VPS hosting over unmanaged VPS hosting. Even if you have the technical expertise, managing the server instead of focusing on your business typically becomes a huge burden.
And if you don’t have enough knowledge of how to manage a server, perhaps there’s no option other than choosing managed VPS hosting. Many people think that choosing managed VPS typically costs significantly more than opting for unmanaged VPS hosting.
However, the truth is that you can choose cheap VPS hosting solutions such as an SSD VPS server from a reputable provider like Elite Server Management. By purchasing cheap VPS hosting solutions from such a provider, you can easily enjoy all the benefits of a managed VPS server at affordable costs.
What Are the Benefits of Choosing Managed VPS Hosting?
Now that you know what’s managed VPS hosting, let’s see the reasons why countless website owners choose this option.
- Your hosting service provider monitors the server 24/7, meaning you get to concentrate on your primary objectives fully. And unless you’re an established business with a dedicated IT support team, this greatly helps you in growing your business.
- If you don’t have enough expertise in maintaining a server, there’s no need to panic. This is because web hosting providers that offer managed VPS have a robust technical team to take care of all the maintenance tasks required to maintain the server’s top performance.
- In today’s era of a steadily increasing number of cyberattacks, it has become simply a must to fix security issues immediately and protect the server as much as possible. Managed VPS hosting service providers not only monitor the servers constantly for viruses and malware, but they also regularly perform security audits to spot security vulnerabilities. The advanced tools used by these teams often remain beyond the reach of many website owners.
- With managed VPS, you often get an easy-to-use control panel to manage your site effortlessly. This control panel lets carry out things like creating databases, adding files to the server, monitoring server performance, etc. This essentially makes the management of the website much easier.
- You’ll get to leverage the power of advanced tools without having to pay anything for them. Your hosting service provider will use them to boost the performance of your server without charging you anything extra.
- Meeting ongoing compliance requirements is a time-consuming and difficult task. With managed VPS, your hosting provider will take care of this, letting you focus on your business.
- Sudden spikes in traffic are quite common for business websites. When you choose managed VPS hosting, the technical team of your hosting service provider continually monitors the volume of your site’s incoming traffic. This constant monitoring helps to ensure that your site won’t crash or poorly perform even if it needs to handle an unprecedented amount of traffic.
- It’s true that the cost of managed VPS is more than that of unmanaged VPS hosting. However, there are two important things that you should consider when deciding on managed VPS vs. unmanaged VPS. First, you can choose a cheap SSD VPS to reduce the cost. And second, it’s always wise to pay slightly more for managed VPS than hiring a full-fledged technical team.
What Is Unmanaged VPS Hosting?
With unmanaged VPS hosting, the responsibility of managing the server comes entirely to you. Your hosting service provider cannot be held responsible for nothing more than the original physical server and its proper availability in terms of guaranteed uptime. But as mentioned above, there are lots of other vital things that need to be taken care of when it comes to managing a server properly.
Right from completing software installation and carrying out maintenance tasks to taking care of core updates, you’ll have to deal with lots of things essential for your server’s top performance. You fail to do any of these and it won’t take much time for the server to demonstrate significantly poor performance.
What Are the Benefits of Choosing Unmanaged VPS Hosting?
We’ve already discussed the benefits of opting for managed VPS. Let’s see the reasons why some website owners still choose unmanaged VPS hosting.
- You can fully customize the VPS server according to your requirements. You can do whatever you want to as long as the resources permit.
- You get complete control over the server in the context of software installation, bandwidth, storage space, memory, usage, etc.
- Unmanaged VPS hosting is more cost-effective than managed VPS because you only need to pay for the server and not for a technical team to manage it.
- You can install and run whatever applications you want to grow your business. Oftentimes, these applications aren’t offered by hosting service providers.
- As you’re managing the server yourself, you can make any changes to it whenever you want without being reliant on an external team.
- You can optimize the server as long as resources are available. Sometimes, this is required to improve user experience and attract more traffic.
Managed VPS Vs. Unmanaged VPS: Taking Your Pick
As you can see above, when it comes to managed VPS vs. unmanaged VPS, both appear with their unique benefits. So, choosing between these two comes down to your unique situation and requirements.
If you want to focus on growing your business without getting deeply involved in managing the server, you should definitely go for managed VPS. This not only helps to ensure that the server delivers its top performance always but it also helps you remain secure and compliant. And as discussed above, there’s no shortage of cheap VPS hosting solutions that can easily help you stay within your budget.
On the contrary, if you have solid expertise in maintaining a server and can invest a significant amount of effort and time in it, you may opt for unmanaged VPS hosting. Before you take this route, it’s important to remember that web hosting providers that offer managed VPS have a solid technical team taking care of their servers. And matching that level of technical knowledge and expertise sometimes becomes simply impossible for even tech-savvy users. It’s also vital to keep in mind that while the cost of unmanaged VPS is typically lower than that of managed VPS hosting, sometimes, the former turns out to be costlier than the latter. This is because if you need to use any advanced tool to manage or maintain the server, you’ll have to procure it yourself.
We hope that this comparison has provided you with enough information on managed VPS vs. unmanaged VPS. Just compare your requirements against what we’ve discussed in this article, and you should be able to take the right decision quickly.

Whether you run an online start-up, a small online business or a large one like an e-commerce store, the type of hosting you choose can make or break or business. Opting for the wrong one not only can severely damage your site’s performance, but may also result in a negative reputation forthe business.
When it comes to web hosting services for businesses, there are two top categories in the market: dedicated server hosting and VPS hosting. Here, the key question is, which one should you choose for your business?
To make an informed decision, it’s vital to have a clear comprehension of how dedicated servers and VPS function on different crucial parameters. To help you out, we’ve created the following dedicated servers vs. VPS comparative analysis.
Here, we’ll compare all the parameters that are vital for the smooth functioning of your website. But before delving deeper, let’s see the fundamental differences between a dedicated server & VPS.
Dedicated Servers vs. VPS: The Basic Difference
This block will give you an idea of the fundamental difference between these two types of servers.
Dedicated Server
Dedicated servers are built to provide the users with the maximum amount of dedicated resources for their sites. Even if you choose a cheap dedicated server, you’ll get a solid and powerful hosting solution. Here, the entire server gets allocated to you, so you can do whatever you want to boost your site’s performance.
VPS
With a VPS hosting solution, your site will use a server that has multiple users. But, despite using the same server, every VPS account gets isolated from the other. This means by choosing VPS hosting, your site will get a certain amount of dedicated resources. And if you opt for a cheap SSD VPS hosting package, you can rest assured of experiencing a significant improvement in your site’s performance.
Dedicated Servers vs. VPS Hosting Solutions: A Comparative Analysis
Now that we have a fundamental idea of dedicated servers vs. VPS solutions, it’s time to compare them to pick the right one.
Resource Allocation
The performance of a site largely depends on the resources allocated to it. With a lack of resources, it’s just impossible to achieve optimal performance of your site.
Here’s where a dedicated server and a VPS stand in terms of resources.
Dedicated Server
If you desire to get the maximum amount of dedicated resources, choosing a dedicated server will be your ultimate solution. No matter if your priority is RAM, storage, CPU/GPU power, or any other software and hardware,dedicated servers have got you covered.
VPS Hosting
Although a VPS hosting solution gives you virtually dedicated resources, you won’t be able to use the entire server. If your site needs resources more than what’s allocated to it, there’s no guarantee that it’ll be available.
Verdict:
If you want to utilize as much resources as possible, choosing a dedicated server will be your best bet.
Performance
Your site’s performance directly impacts the revenue and growth of your business. That’s why this is considered one of the top parameters in any dedicated servers vs. VPShosting solutions comparison.
Let’s see how dedicated servers and VPS hosting solutions can help improve your site’s performance.
Dedicated Server
Since the performance of your site is directly reliant on the server resources available to it, a dedicated server will help it deliver optimal performance. In fact, you’ll be able to install additional hardware and third-party software to boost your site’s performance.
VPS Hosting
With VPS hosting, the availability of resources gets limited due to the fundamental nature of resource allocation. You can always opt for more resources to improve your site’s performance, but it’ll depend on the availability of server resources. This means you may not be able to ensure that your site will always deliver its best performance.
You can also install third-party software and additional hardware within a VPS hosting environment, but again, it’ll be dependent on the resources allocated to you.
Verdict:
If you want to ensure the top performance of your site always, you should opt for a dedicated server.
Setup
Setup time often becomes very important for many business owners. And that’s the reason you need to consider this parameter when comparing dedicated servers vs. VPS hosting solutions.
Let’s see what these two types of servers have got for us.
Dedicated Server
Irrespective of the type of dedicated server you choose, you must be ready to give your hosting provider at least a couple of weeks’ time to finish the setup. As dedicated servers are custom-built according to the requirements of the customers, building them takes a good amount of time.
VPS Hosting
With VPS hosting, you can have your server ready within just one or two days from completing your purchase. Since your hosting provider doesn’t need to build the entire server from scratch, it just needs to activate your account to let you start using it.
Verdict:
If you have a strict deadline or desire to launch your site as quickly as possible, choosing VPS hosting will be the right thing to do. If you’re in no rush, then you may go with a dedicated server.
Scalability
For any online business, it’s normal to add more resources as it grows. Without adequate resources, it’s just impossible to maintain good site performance.
Here’s the comparison between dedicated servers and VPS hosting solutions in terms of scalability.
Dedicated Server
With a dedicated server, it’s significantly difficult to add resources. This is because adding resources to a pre-configured server is both a time-consuming and costly affair.
Therefore, if your site needs more resources within a dedicated server environment, you’ll most likely have to choose a new server with better resources. Migrating to another server is not only a time-consuming process, but it’ll also damage your site’s performance during that time period.
VPS Hosting
On the contrary, VPS hosting lets you add or remove resources within a few minutes. If you need more resources than the present ones, just contact the hosting service provider, and you’re done. If you want to remove resources, you can do it yourself with a few clicks of the button.
Even if you need to upgrade your existing hosting plan, it’ll be a seamless, effortless, and quick process. And there’ll be an almost negligible impact on your site’s performance.
Verdict:
VPS hosting is the clear winner here. It’ll give you much more scalability than a dedicated server.
Configurability
The more a server’s configurability, the better you can customize it to meet your business’s goals.
Let’s see what dedicated servers and VPS hosting solutions provide us with respect to configurability.
Dedicated Server
Most of the time, when you opt for a dedicated server, you get an empty server without any pre-installed software or an operating system. So, you can do almost anything with the server, meaning you get the maximum level of configurability.
However, it’s important to note that configuring a server successfully requires a good level of technical know-how, and it’s a time-consuming process. So, be sure to review this aspect carefully.
VPS Hosting
In most cases, hosting service providers offer VPS hosting packages with pre-installed software. This means you won’t necessarily need to have a good level of technical expertise to configure the VPS. Moreover, VPS hosting solutions usually come with a standard level of technical support from the hosting provider, reducing your headache.
Verdict:
If you desire to have the maximum configurability, ensure that your dedicated server or VPS comes with full root access. Just keep in mind that configuring a dedicated server will be significantly more difficult than a VPS.
Server Management
Server management plays a huge role in dictating how your site will perform. Although hosting service providers consider server management a top priority, it differs depending on your chosen type of hosting solution.
Let’s see where thisdedicated servers vs. VPS hosting solutions comparison stand in terms of this parameter.
Dedicated Server
Dedicated servers are available in two forms: unmanaged and managed. If you choose an unmanaged dedicated server, then the whole responsibility of managing the server will be on you. There’ll be no support available from your hosting provider.
Server management involves a lot of crucial activities. From ensuring server speed and security to maintaining optimal performance of its different components and a lot more, you’ll have to take care of everything. Since this is a highly time-consuming process, business owners often find it very difficult to manage it properly.
However, by choosing a managed dedicated server, you can fully concentrate on growing your business while the expert technical support team of your hosting provider takes care of the entire server management part.
VPS Hosting
When it comes to picking between amanaged dedicated server and VPS hosting, perhaps the biggest difference is that the latter comes with some degree of technical support, even if you choose an unmanaged plan. So, naturally, you won’t need to invest a significant amount of time and effort to manage your VPS. Also, since the main server is maintained by the hosting service provider, it’ll require less technical expertise to manage your VPS.
Similar to managed dedicated servers, if you opt for a managed VPS server, the entire server management will be your web host’s responsibility. It’ll be fully responsible for ensuring the server’s optimal performance.
Verdict:
Choosing a VPS will be your best option if you want to opt for an unmanaged server. However, if you wish to go with a managed server, you may choose either a dedicated server or a VPS based on your requirements as per other parameters.
Security
With the steadily increasing number of cyber security issues, maintaining the site’s security has become the number one priority for business website owners. Since these sites deal with sensitive information of the customers, a lack of security may lead to several irreversible damages to the businesses.
Here’s how a dedicated server and a VPS help to secure your site.
Dedicated Server
In general, your site remains more secure when hosted on a dedicated server. This is simply because it’s the only user of the server, and hence, the scope of getting affected by the activities of other users is absolutely zero.
VPS Hosting
While your site gets its own virtualized server in a VPS hosting environment, there remains a possibility of getting affected by the activities of other websites on the server. This is because you only get control over the resources that are allocated to you and not on the entire server.
Since other websites also share the resources of the actual physical server, it may lead to security breaches through them. Basically, within a VPS hosting environment, it’s just impossible to ensure that all the users follow the latest security best practices.
Verdict:
Although it isn’t possible to ensure that your site will remain fully secure always, you can surely take the security quotient to another level by choosing a dedicated server. A VPS hosting environment is also highly secure but it cannot compete with a dedicated server.
Pricing
Pricing is among the top parameters of any dedicated servers vs. VPS hosting solutions comparison because it dictates what your site will get to deliver its performance.
Here’s where dedicated servers and VPS hosting solutions stand in terms of pricing.
Dedicated Server
With dedicated server hosting, since you get to use the entire server, its price will be much higher than that of VPS hosting. No matter what kind of dedicated server hosting solution you opt for, you need to be ready to pay a large sum of money to enjoy the benefits.
VPS Hosting
The price of VPS hosting is much lower than that of a dedicated server. This is because your site gets to use a virtualized server with specified resources allocated to it.
Verdict:
There’s no winner in terms of pricing. If you have the budget and want your site to use the maximum amount of resources solely, you can opt for a dedicated server. If you want your site to deliver top performance with a relatively limited amount of resources, you should go for VPS hosting.
Dedicated Servers vs. VPS Hosting: Final Verdict
As the above dedicated servers vs. VPS hosting solutions comparison shows, both kinds of servers have their own advantages and disadvantages. So, picking the right one between them comes down to your budget and requirements.When deciding on the type of hosting solution, be sure to assess all the above parameters against your every requirement and future plans with the business.

Fundamentally, if you want to build your own blog or website, WordPress is the easiest method around. In fact, a whopping 43% of all the sites available on the Internet are powered by it. Millions of users across the globe use WordPress each day to build and maintain their digital presence.
That was perhaps the simplest definition of what is WordPress. But as you already know, when you talk about something most popular in the world, there have to a lot of related aspects to know about.
That being said, if you want to know how to build a website using WordPress, first, you need to obtain a clear knowledge of what is WordPress. This is the reason we’ve created this beginner’s guide to help you navigate the process of how to make a website using WordPress with ease.
Let’s explore WordPress!
What Is WordPress? A Technical Definition
WordPress is the most sought-after open-source CMS (content management system) that you can use to build and manage a website. Basically, a content management system is designed to simplify vital aspects of a website without requiring any coding knowledge.
WordPress (we’re talking about WordPress.org here) is licensed under GPL v2, meaning anybody can use or modify it without paying anything.
With WordPress, you get an intuitive interface to add and alter content on your website. Every piece of content that appears on your WordPress site, from your pages and posts to your site URLs and user accounts, is stored and organized by its database.
As mentioned above, WordPress has garnered incredible popularity and its user base includes everyone, from large corporations to individuals. Some of the popular names using it include Microsoft, Whitehouse, and The Rolling Stones.
Top Benefits of Using WordPress
Now that you know what is WordPress, let’s take a deeper look at the key reasons behind its massive popularity.
- It’s free & open-source
Perhaps the biggest reason behind the immense popularity of WordPress is it’s completely free and open-source. You’ll never need to pay anything to use the platform. The only thing you’ll have to pay for is the web hosting solution.
- It has a massive ecosystem of plugins and themes
You don’t need to be a developer to take your WordPress site’s functionality to another level. The presence of thousands of WordPress themes and plugins has made it possible for anyone to build a professional-grade website without requiring any coding skills.
- It can be installed quickly and easily
These days, most web hosting providers offer a one-click WordPress installer that you can use to install the software easily and quickly. Even if your hosting package doesn’t come with an installer, you can do it conveniently by downloading the software from the official WordPress.org website.
Reviewing the Difference between WordPress.com and WordPress.org
Although when answering the question what is WordPress we often refer to WordPress.org, it also has a version, namely WordPress.com. Let’s see what each of these entails.
While WordPress.com uses WordPress.org software, it’s a paid service. This is a managed hosting platform, meaning you cannot install it on your personal host. Despite the service being easy to use, it doesn’t offer the flexibility of WordPress.org.
This is the open-source, free WordPress software that can be installed on your personal web host to build a fully personal website. As a group of volunteers is responsible for developing, maintaining, and supporting the software, you get to use it at zero cost. If you wish to retain prime control over your site, WordPress.org will most likely be your ideal option.
How to Build a Website Using WordPress
Primarily, WordPress started its journey as a tool to build a blog instead of a traditional website. However, today, it lets you build any kind of website, thanks to its huge ecosystem of themes and plugins and modifications to its core code.
Before we delve deeper into the detailed steps of how to make a website using WordPress, let’s see the types of websites that can be built using it. These include:
- Business websites
- Blogs
- E-commerce websites
- Forums
- Resumes
- Portfolios
- Membership websites
- Social networks and almost any other kind of site you can imagine
The process of how to build a website using WordPress is quite straightforward. Just follow these steps, and you’ll come up with a beautiful, professional-looking website.
Step #1: Choose Your WordPress Platform
As discussed above, the free, self-hosted WordPress.org platform is the best solution for most users. It has thousands of themes and plugins using which you can build almost any kind of website.
Just note that with WordPress.org, you need to arrange your domain name and purchase web hosting. These are also two key factors behind the free availability of the platform.
Step #2: Select Your Domain Name
It’s vital to choose a domain name that directly relates to your niche. It also needs to be something that can be easily remembered by your users. If required, do some keyword research.
Step #3: Obtain Web Hosting
To make your site available on the Internet, you’ll require web hosting. The web host you’re going to choose will store all the files of your website.
This is one of the most detailed steps in the entire process of how to make a website using WordPress because the type of hosting you choose will dictate the performance of your site.
Here’re four types of hosting solutions WordPress users commonly choose.
- SSD VPS hosting
While a cheap SSD VPS hosting package costs slightly more than a basic shared hosting package, it comes with some unparalleled benefits. These essentially include better website performance, improved site loading speed, and better durability.
You may also note that fast site loading speed is among the key ranking factors used by search engines. This means a fast-loading site may help you acquire better SERP rankings, improving your online visibility.
- Dedicated server hosting
If you have the budget and want your WordPress site to use all the resources of a server, you should go for a cheap dedicated server hosting package. Although purchasing dedicated server hosting is usually the most expensive option, you may see a dramatic improvement in your site’s performance.
As you get to use all the server resources, you’ll also be able to install any kind of plugin depending on the resources’ limitations.
- WordPress hosting
You should buy WordPress web hosting if you want to have a solution that has been optimized to fulfill the performance and security requirements of WordPress websites. Additionally, these hosting solutions typically come with a one-click WordPress installer that makes it easier to start using WordPress.
Two types of WordPress hosting solutions are commonly offered by web hosts: shared WordPress hosting and managed WordPress hosting. Almost always, the former comes at a cheaper cost than the latter. However, managed WordPress hosting gets you better speed and improved security, among other benefits.
- WordPress reseller hosting
A WordPress reseller hosting solution lets you start your own WordPress hosting business. First, you buy WordPress hosting from a web host and then sell the service to other customers.
If you want to go with this option, you must choose a top-tier hosting provider. This is because all the technical aspects like the server, hardware, maintenance, and support will be managed by your hosting provider.
Step #4: InstallWordPress
If your chosen hosting package comes with a one-click WordPress installer, use it to get started with the platform. Or else visit the official site of WordPress.org, and download and install the software from there.
Step #5: Choose Your WordPressTheme
WordPress themes control the visual appearance of WordPress sites. These are professionally-designed templates that can be installed on your site to modify its appearance.
By default, a basic theme remains present with every WordPress site. If you don’t like it, search online, and you can find thousands of paid and free WordPress themes that can be installed on your site to get the exact appearance you want it to have.
Once you’ve found the right theme, install it. You can also customize it using either the WordPress customizer or a third-party plugin.
At this stage of how to build a website using WordPress, you don’t necessarily need to finalize all the theme settings because you’ll be able to do it later after adding some content to your site.
Step #6: AddContent to Your WordPressSite
By default, two content types are available with WordPress: pages and posts. Pages refer to the static type of content like your about page, custom landing page, privacy policy page, contact page, etc.
On the contrary, posts are designed to meet your site’s blogging functionality. In terms of appearance, newer items get displayed first (reverse-chronological order).
By default, your blog posts are shown by WordPress on your site’s front page. However, it can be changed, and you can choose any static page as your home page.
You can build a separate page dedicated to your blog posts. You can also build a site without a blog section.
Start by adding a couple of pages to the site. If you don’t have sufficient content to build the pages immediately, don’t worry, as you can always update them later.
You’ll need to use the page editor available in the WordPress admin area (Pages >> Add New). Once you add some content to the pages, hit the “Publish” button to make them live on the website.
If you want to add a couple of blog posts, visit the WordPress admin area (Posts>> Add New). There you’ll see a screen similar to the one you saw when adding pages. Once you create a post, you can either store it as a draft or publish it to make it go live on the site.
Step #7: Customize Your WordPress Site
As you have some content on the site, you can customize the pieces to make them more presentable to your users. You can customize many different things on your WordPress site. From changing your home page, site’s title and tagline to creating navigation menus and setting up a comments section, you’ll be a do a lot of things.
Step #8: Install WordPressPlugins
WordPress plugins let you add customizations and features such as photo galleries, contact forms, etc., to your site. Apart from lots of plugins available on WordPress’ Plugins page, you can buy plugins from third-party developers and websites.
Whether you want to connect the site with Google Analytics to see the way visitors find and utilize it, a drag-and-drop builder to build custom layouts and designs, build an e-commerce site, or improve security measures of your site, you can do them all and more with WordPress plugins.
Step #9: Make Your Site Search Engine Optimized
Regardless of your niche, without SEO, it’ll just be impossible to improve your rankings in the search result pages, which lead to improved online visibility and, eventually, more organic traffic. So, make sure that all your pages have relevant keywords.
There are also various WordPress SEO plugins available that you can use to optimize your site for search engines.
Step #10: Back Up Your WordPress Site
Content is the most important thing in your WordPress site, so you must back up the site. With a regular backup schedule in place, you won’t need to start from scratch if anything goes wrong.
While there are plugins available for this job, you should see if your web host offers any such provision. As every good web host has a technical team, the backup process will bea correct and systematic one, letting you focus on doing your thing with the site.
Step #11: Improve Your Skills in UsingWordPress
Although WordPress is very user-friendly, it’s a robust content management system with many different things that you can master. Therefore, it’s advisable to keep on reading popular blogs and watching videos related to WordPress to improve your knowledge.
Moreover, if you get stuck somewhere when using WordPress, these resources will be of great help. And robust WordPress communities are also available that you can reach out to for any kind of WordPress-related help.
Wrapping Up
As you can understand from the above, there are diverse reasons behind the huge popularity of WordPress. Now that you have a good concept of what is WordPress and how to build a website using WordPress, what are you waiting for?
Just follow the steps of how to make a website using WordPress we discussed above, create your own site, and start exploring WordPress!

How To Create A Website For A Small Business: These days, building a good online presence has become almost a necessity, regardless of the size of your business. A professional-looking website with a simple user interface can help you promote your products and/or services to your target audience, attract online traffic, drive sales, and improve your brand recognition.
When it comes to building a website, you have two options: creating it on your own and hiring a web developer. While the second option is completely hassle-free, it comes at a high cost as well. The cost aspect is perhaps the biggest factor that keeps small business owners from hiring a web developer.
With that in mind, we’ve created this guide on “how to create a website for a small business.” Here, we’re going to discuss the step-by-step process of building a website for your small business. Although the process may seem a bit complicated at first, you should find it easier if you follow the steps thoroughly.
Let’s build a website for your small business.
How to Build a Website for a Small Business: The Step-By-Step Process
The following steps are the fundamental ones of how to make a website for a small business. This means you can always perform additional tasks to add more features to your website or make it more secure.
Step 1: Determine the Key Objective of Your Website
A business website can belong to any category, depending on the nature of the business. However, you must ensure that your site communicates exactly what your business does. Or else, the primary objective of your site – attracting the right online traffic – will remain unfulfilled. Always remember that if your target audience cannot find your website easily, it’ll go to one of your competitors, obstructing the growth of your business.
Step 2: Select a Website Builder
The second step of how to create a website for a small business by yourself is to choose the right website builder. Remember to select one that doesn’t require any coding knowledge. You can choose from WordPress or good website builders.
When it comes to WordPress, you have two choices: WordPress.com and WordPress.org. While WordPress.org requires hosting to be arranged separately, it offers more control over a site and the best features. So, it’s advisable to build your site using WordPress.org.
Reputable website builders provide all-in-one solutions and generally come with a drag-and-drop feature. It makes the process of how to build a website for a small business faster and easier. You may choose from popular website builders like Wix or Squarespace. Just remember that while you won’t need to search for a separate hosting service, you might not have complete flexibility with your site’s design.
Step 3: Select the Right Domain Name
This is one of the most vital steps of the process of how to create a website for a small business. Your domain name is the address of your website, i.e., its URL. When choosing the domain name, you should consider its usability and SEO benefits.
Here’re some tips to do this.
- Choosing a name that represents your business
- Making it easy to spell
- Avoiding very esoteric words or slang
- Keeping the length as short as you can so that people can easily remember it and type it appropriately
- Avoiding hyphens and numbers as they make an URL less elegant and difficult to remember
- Choosing the appropriate domain extension according to the nature of your business
- Creating an SEO-friendly URL that includes your primary keyword
You can try an online domain name generator like DomainWheel to get some inspiration. You don’t necessarily need to purchase the domain name right away. You’ll be able to complete the domain name registration process when signing up for the hosting service for your website.
Step 4: Select a Hosting Service Provider and Hosting Type
Choosing the right hosting service provider and type of hosting is another vital step in the process of how to create a website for a small business. Without signing up with a hosting provider, you won’t be able to make your site available on the Internet.
Hosting service providers offer different types of hosting solutions that you can choose from, depending on your requirements and budget.
Here’re brief overviews of the options commonly available on the market.
- Shared hosting
Ideal for small business owners, shared hosting solutions are the most cost-effective options available. Here, your website will share the resources of a server with lots of other sites, which may harm the performance of your site. Also, if one of the sites on the server experiences a cyberattack, your site may also become affected.
However, if these things aren’t that much important to you, you can buy cPanel web hosting. As cPanel is one of the most popular and user-friendly control panels, managing your site will be easy for you.
- VPS hosting
Slightly costlier than shared hosting, VPS (virtual private server) hosting is another heavily preferred option for small business owners. With a VPS hosting solution, your site will get to use virtually partitioned resources of a server.
As a result, it won’t be impacted by the activities of other websites on the same server, whether they consume high amounts of server resources or get hacked. This essentially boosts the performance and security quotient of your website. You’ll also get much better control over your site and scalability with a VPS hosting package. Although different types of VPS hosting solutions are offered by web hosts, you may go with a cheap SSD VPS package to experience all the benefits at an affordable cost.
- Dedicated server hosting
This is typically the most expensive web hosting option, and hence, many small business owners choose it when there’s an absolute requirement for it. By choosing a cheap dedicated server hosting package, you’ll ensure that your site gets to use all the resources available on that server.
You’ll get complete control over your site together with maximum flexibility and customizability. This means you can do anything to improve the performance, security, or any other aspect of your site, as long as the server resources can handle it.
If your business happens to be a web host, which means you run a hosting company, remember to choose a cheap cPanel reseller hosting solution. You’ll be able to provide your customers with an excellent control panel to manage their websites at affordable rates.
Here’re some important things you should consider when selecting a hosting service provider.
- Technical support
Web hosting is a complex, technical field where technical support plays a vital role in ensuring the smooth functioning of your site. Therefore, you need to make sure that your web host offers different options to contact the technical support team.
It must offer live chat and/or phone support along with other options like email support and support tickets. The presence of live chat and/or phone support allows you to resolve issues immediately, while support tickets and email support may take a significantly longer time.
- Presence of an easy-to-use control panel
You’ve probably noticed that we’ve been mentioning cPanel whenever we discussed something related to the control panel. If you don’t want to hire a server administrator or use terminal commands to see the server contents and make modifications, choose a web host that offers cPanel or something similar.
- Server security
Security measures implemented on the servers of your chosen web host play crucial roles in protecting your site from online attacks. Web hosting service providers commonly take several security measures to protect their servers.
These usually include letting you access the server via SFTP (Secure File Transfer Protocol), offering free SSL certificates that can be quickly installed by their customers, and taking regular backups of their servers. If your web host has a security protocol in place, try to see that to understand their security measures.
Step 5: Select a Website Design
If you have WordPress as your site builder, by default, it comes with a basic template that can be used as your site’s design. If you want to go with a different template, thousands of paid and free WordPress themes are available from many different developers. You can easily access them by doing a quick online search.
Other website builders also have a good collection of different themes. You only need to choose and install your preferred one. Regardless of the theme developer, be sure to choose a professional-looking, simple design with all the right elements.
Usually, business websites come with a navigation menu placed on top. The homepage normally comprises a welcome message, a CTA button, and other pieces of content.
Step 6: Add Site Pages
A good business website should contain different pages apart from the homepage. These pages show different aspects of the business, like your story, products or services, blog section, contact information, etc. You need to ensure each page is focused on its primary objective and includes a strong CTA (for example, “buy this,” “sign up,” “learn more,” etc.).
Here’re the types of content each of the site pages should contain.
- Homepage
Generally, your homepage is the first thing your visitors will see upon visiting your site. This should provide a brief yet clear description of what your business does. Add short descriptions of your products and/or services together with clear navigations, using which visitors can get detailed information about them.
- About us page
This page typically includes your story, information about your team, along with your vision and mission behind building the business.
- Products and/or services pages
These pages should contain detailed information about your offerings. Be sure to add strong CTAs to each of them.
- Contact page
Here, you should include all your business contact details to help visitors reach out to you if they have any queries.
- Blog page
Maintaining a blog section has become almost a must for all types of businesses. Add informative posts to this page to improve your brand awareness and establish your business as an authority in its niche/industry.
Step 7: Install a Good Content Management System
A CMS (content management system) stands for a software application or program that you can use to create and manage your website content. Choose a CMS that’s user-friendly, affordable, and doesn’t require much technical expertise to use.
Here’re three popular content management systems that you can choose from.
- WordPress
The world’s most sought-after CMS, WordPress has all the features required to manage all your content-related activities and a robust support community. You can also find lots of plugins for this free CMS to extend your site’s functionality.
The downside of WordPress is that it’s frequently targeted by hackers, thanks to its massive popularity. So, if you choose WordPress, you must implement advanced security measures to protect your site.
- Drupal
This is also a popular CMS and comes with many useful features like WordPress. Although it’s safer than WordPress, it has significantly fewer theme options and plugins than WordPress. This sometimes limits the extensibility of the sites.
- Joomla
The notable thing about Joomla is that it appears with better security, SEO, and multilingual capacities than WordPress. However, if you want to go with WordPress, there are plugins available that can help you achieve a better performance than Joomla.
Step 8: Select an E-Commerce Platform (If Applicable)
If you want to sell products and/or services from your site, you need to integrate an e-commerce platform with it. If you don’t do it currently, you should think about it as it can potentially boost your revenue.
Here’re some popular e-commerce platforms to help you make an informed decision.
- Shopify
You can use this cloud-based e-commerce platform to build and customize your online store and manage all necessary things from a centralized location. Just remember that since it’s a standalone platform, your online store will technically be separate from your main website.
Shopify comes with a plethora of features like unlimited bandwidth, unlimited products, discount codes, fraud analysis, detailed reports, and a lot more. Moreover, you won’t need any technical knowledge to set up a Shopify store as everything is already there on the backend.
As for the disadvantage, you won’t have as much flexibility or control over the store as you’d with other platforms like WooCommerce.
- Shopify Plus
Developed using the Shopify platform, Shopify Plus brings you international e-commerce options, more staff accounts, better customizability, and a more advanced level of support. Remember that all these features come at a higher cost than Shopify.
- WooCommerce
WooCommerce is a WordPress extension and belongs to the most sought-after e-commerce platforms in the world. While there are lots of WooCommerce plugins available, being a WordPress extension makes it even more flexible. The platform itself comes with a high degree of scalability and lots of features sufficient for most small business owners to increase the revenue of their online stores.
If you explore WooCommerce, you’ll find lots of pre-built premium and free themes available for it. It’s always advisable to go with a premium theme offered by a popular developer as it’ll provide better support and security.
Step 9: Implement SEO Best Practices
If you want to use your website as the main source of your customers, you must implement SEO (search engine optimization) best practices to it. They can help your site achieve better rankings in the search result pages, which leads to an increase in your organic traffic.
Once you have a steady source of good amounts of organic traffic, you can use CRO (conversion rate optimization) techniques to convert your visitors into loyal customers.
You can follow these common SEO best practices.
- Optimizing the headlines, meta tags, and meta descriptions
- Implementing an SEO-friendly site architecture
- Establishing simple navigation using internal links
- Thorough keyword research and inclusion of relevant keywords into your website content
- Improving your site’s loading speed
- Using proper coding for the site
- Improving its security quotient using measures like installing a good SSL certificate
- Ensuring your site’s mobile-friendliness
- Acquiring high-quality backlinks from topically relevant, authoritative websites
- Adding your business’s social media profiles to your site
It’s important to note that SEO is a continuous process and takes time to demonstrate results. But once the benefits start to generate, they continue for years. You only need to monitor your site’s SEO performance regularly and tweak the tactics if required.
You should also note that SEO is a vast, complex field and keeping pace with the ever-evolving SEO parameters requires significant expertise, time, and effort (and sometimes money also!). However, if you cannot hire an SEO expert to improve your site’s SEO performance, you should try to consult one to stay on the right track.
Step 10: Publish the Website on the Internet
We’ve reached the last step of the process of how to create a website for a small business. If you used WordPress, it has already made your site available to the public. If you used other site builders, your site might remain private unless you publish it.
Whether it’s already published or not, remember to do the following last-minute things.
- Preview the site on different devices to ensure it’s properly viewable on each of them
- Read your site content thoroughly to ensure its accuracy
- Eliminate any unnecessary pieces of content from your site
Once your site is published, you can start promoting it on social media platforms and through other digital marketing techniques.
Develop a Site Maintenance Plan
While the process of how to create a website for a small business encompasses the steps we discussed above, your job doesn’t end with publishing your website. Regular maintenance is a must to help your site deliver its best performance always.
Here’re some maintenance tips that you may want to follow.
- Review the reports generated by webmaster tools regularly to spot errors as soon as you can
- Analyze your organic traffic data to get valuable insights about your target audience, which helps you serve them better
- Review performance data to fix errors and warnings and optimize your site
- Always keep all software and applications up-to-date
- Run security scans regularly to ensure your site is safe and clean of viruses
- Take regular backups to make sure you can retrieve the data if something goes wrong
- If your site has multiple variations, perform A/B testing to identify which one of them delivers better performance
Final Thoughts: How To Create A Website For A Small Business
As you can see, the process of how to create a website for a small business isn’t as difficult as many business owners think. Just be sure to follow the steps we mentioned in this guide, and you should be able to build and publish a website for your small business within a couple of hours.

Are you planning to upgrade the drive of your computer from the traditional HDD to the modern SSD? If yes, you’ve probably seen that two types of SSDs are available in the market: NVMe SSD and M.2.
Although both are SSDs (solid-state drives), they come with significant differences between them. To help you out, we’ve created this post on NVMe SSD vs. M.2, mentioning all the major differences. Once you complete reading this post, you should be able to choose the right drive for you.
Before we delve deeper into the battle of NVMe SSD vs. M.2, it’s important to have a clear idea of each of them. So, let’s see brief overviews of NVMe SSD and M.2 first.
What Is NVMe SSD?
NVMe stands for Non-Volatile Memory Express. First appeared on the market in 2013, NVMe is an open standard built to let modern SSDs function at the read/write speed according to the capacity of their flash memory.
The beauty of NVMe lies in the fact that it lets the flash memory function as an SSD straight through the PCI Express (PCIe) slot on your computer’s motherboard rather than utilizing SATA and being restricted by the slower SATA speed. As the SSD can directly communicate with the CPU, it minimizes program load times and increases read/write speeds.
So, NVMe is an interface protocol that stands for the method through which data is transferred. Depending on the manufacturer of your NVMe drive, you may experience five or six times faster speeds compared to a SATA-based equivalent.
It’s important to note that transfer rates are primarily reliant on the generation of the PCIe that’s being used by your NVMe drive. Presently, the highest speed for a generation 4 NVMe PCIe SSD can go up to 7,500MB/second, while a generation 3 NVMe PCIe can reach a maximum speed of 3,500/second.
What is M.2?
Before we try to understand M.2, it’s important to discuss form factors. You can find lots of commercial HDDs available in 2.5” and 3.5” form factors. Until recently, the majority of SSDs were available in 2.5” form factors. The majority of these were SATA drives that require power and data cables.
M.2 is the most recent form factor for SSDs that can be plugged directly into your computer’s motherboard without requiring any additional cables. M.2 SSDs appear in notably smaller sizes than 2.5” traditional SSDs. They’ve become sought-after options for gaming setups as they consume less space.
Despite their smaller sizes, M.2 SSDs can hold an equivalent amount of data as other SSDs, and their storage size can go up to 8TB. Note that you can buy M.2 SSDs in NVMe versions and SATA versions. The difference between the versions signifies the bus they utilize to communicate with your computer’s other components electrically.
Because of this versatility, an NVMe M.2 SSD can provide up to five times greater bandwidth compared to a SATA M.2 model. This essentially helps your computer deliver better performance for compression, decompression, transcoding, photo or video editing, and file transfers.
NVMe SSD vs. M.2 Comparison
Features | NVMe SSD | M.2 |
---|---|---|
Size | 22mm x 30mm | 22mm x 60mm |
Applications | High end computers & laptops | High-Mid range computers & laptops |
Advantages | Superfast speed | Required less space |
Disadvantages | Higher cost | High Cost |
Form Factors | M2, U2*, PCIe card, | n/a |
Price | $70 – $160 | $ 50 |
NVMe SSD vs. M.2: Which Is Better?
Now that you know the results of the NVMe SSD vs. M.2 battle, let’s try to understand if you should buy NVMe SSDs or M.2 SSD. We’re going to discuss the key factors that you need to consider when deciding NVMe SSD vs. M2, which is better for you.
NVMe SSD vs. M.2 SSD Speed
In the context of the drive speed, you should note that 2.5” SSDs and SATA M.2 drives offer the same speed level. As mentioned above, whether you choose an NVMe SSD or M.2 SSD, the speed will remain the same depending on the PCIe generation.
Therefore, if you’re planning to buy dedicated server and you want to improve its performance, you need to buy NVMe dedicated server.
Although you’ll have much faster performance with NVMe SSDs than with SATA drives, your computer’s processor might also need an upgrade to maintain that level of performance. Also, be sure to review the read/write speeds on the drive because NVMe drives of some earlier generations may provide different speeds.
Size
While you can find some NVMe drives that can be plugged into standard PCIe motherboard slots similar to a graphics card, the majority of NVMe drives these days utilize the M.2 form factor. So, if you consider NVMe SSD vs. M.2 in the context of size, in most cases, there isn’t any difference at all.
The width of an M.2 slot is 22mm, and its length can vary based on your computer’s motherboard slots. The measurements may vary between 16mm and 110mm (the majority of drives come with a length of 80mm). Before you buy the drive, you only need to ensure that your device has enough space for it.
Price
Again, there’s no significant difference between the prices of NVMe SSDs and M.2 SSDs. For instance, if you want to buy a 500GB NVMe SSD, you’ll need to pay anything between $70 and $160. The only difference is that the lower side of the cost may go down to $50 in the case of an M.2 SSD.
Use
Both NVMe SSDs and M.2 SSDs are commonly used in higher-end and mid-range pre-built desktop computers and laptops. So, there’s no significant difference between them.
Final Thoughts: NVMe SSD vs. M.2
As noted above, NVMe refers to the interface, and M.2 stands for the most recent form factor for SSDs. So, when you merge their powers, you can get a superfast SSD drive with almost zero visible footprints.
The factor that you actually need to focus on is whether you should buy an M.2 NVMe drive or M.2 SATA drive. If you want your computer to deliver standard performance, you can opt for an M.2 SATA drive. However, if you want to do anything that needs faster read and write speeds or need to get the maximum out of the computing speed, you should go with an NVMe drive.
Additionally, while some motherboards may have compatibility with M.2 form factor, they might not support NVMe. Therefore, it’s very crucial to ensure that your computer’s motherboard supports both before you buy an M.2 NVMe SSD.
Lastly, because of their faster data transfer rates, M.2 NVMe SSDs run hot sometimes. Therefore, it’ll be wise to have a good cooling solution for the computer before installing the SSD. It’s also a must to back up all your data before replacing the existing drive.

If your business significantly relies on your website, then hosting has to be one of your top priorities. After all, the right hosting solution helps your website handle traffic spikes efficiently and enjoy superb uptime.
And if you have something like an e-commerce store or a large website, most likely, you’ll need a dedicated server hosting solution to ensure smooth functionalities of your website. When it comes to dedicated server hosting, there are two types of solutions available: managed server and unmanaged server.
It’s very important to understand the major differences between managed and unmanaged servers, as the right choice can significantly impact your site’s functionalities and, in turn, your business.
In today’s post, we’re going to take a detailed look at managed vs. unmanaged servers to help you make an informed decision. After going through this article, you should be able to pick the right kind of server according to your specific requirements.
We’re going to talk about the advantages and disadvantages of each kind of server so that you can have a clear understanding.
Let’s get started!
Managed and Unmanaged Server Comparison
Managed servers | Unmanaged server |
---|---|
Web hosting service to take care of the management of the servers | Site owners to manage the servers |
Managed servers are more expensive | Unmanaged servers could end up being expensive in the long run |
Doesn’t required technical knowledge | Technical knowledge required |
Automatic backup provided | No automatic backup provided |
Highly secure | Highly secure |
Support provided by web hosting provider | Support not provided |
What’s A Managed Dedicated Server?
As the name suggests, with a managed dedicated server hosting solution, you don’t have to think about managing the server regularly. The web hosting company will be fully responsible for handling all the tasks required to facilitate the smooth functioning of the server.
These tasks commonly include taking automated backups, conducting regular security checks and scans, hardware monitoring, performance monitoring of the server, and offering a great deal of technical support.
With the help of your hosting provider, you can also make necessary changes to the server or its configuration to meet specific goals.
Advantages of Choosing a Managed Server
- Server maintenance
As mentioned above, your web host will take care of all the server-related tasks, from backups to security measures and everything in between. Many hosting providers will also help you recover your data from the backup if something unexpected happens.
- Ease of use
In the context of managed vs. unmanaged dedicated servers, ease of use plays a vital role. As the hosting provider manages the server’s maintenance and applications running in it, you typically get a better user experience. Moreover, you can easily have your preferred application/software installed on the server with the help of your web host to make it more user-friendly.
- Performance
Better performance of the server is another key difference between managed and unmanaged servers. In almost all cases, experienced engineers handle all the tasks on behalf of the hosting provider. This typically leads to a better overall performance of your server.
Disadvantages of Choosing a Managed Server
- Zero or minimum management control
When it comes to a managed vs. unmanaged server, a significant lack of control with the former sometimes acts as a deterrent for some users. Since all the tasks are handled by the hosting provider, you get very less, or sometimes zero, control over the way it manages the server.
For instance, if your hosting provider takes weekly backups for all its managed servers, but you want daily backups, it may not be possible anyway to achieve this.
- Restrictions on software deployment
Although this isn’t common, sometimes, web hosts place restrictions on the type of applications or software you can deploy on your server. They may also restrict you from choosing certain configurations or adding particular plugins.
- Cost
The cost of a managed server is significantly higher than that of an unmanaged server. The reason is quite straightforward. The hosting provider needs to employ professionals to manage all your server-related tasks, and they don’t come free.
What’s An Unmanaged Dedicated Server?
Unlike a managed server, you’ll be fully responsible for maintaining the server when you choose an unmanaged one. From its configuration, network connection, and security aspects to backups and hardware maintenance – you’ll need to manage everything.
If you want to upgrade the software or install anything new, you need to have the technical expertise to do so. In case you don’t have the required technical knowledge, every time, you’ll have to hire a professional to do the job. This is the reason sometimes the long-term cost of maintaining an unmanaged server exceeds that of a managed one.
Advantages of Choosing an Unmanaged Server
- Total control over the server environment
Since you need to manage everything with an unmanaged server, you can do whatever you want to do with it. From installing your preferred operating system and applications to deploying security measures and taking backups – you get to decide how to manage them.
- Cost
Cost is an obvious difference between a managed and unmanaged server. In any case, the cost of an unmanaged server will be significantly lower than that of a managed server.
But as we mentioned above, either you yourself have the technical expertise to manage all the required tasks or hire a professional to do it. In case you choose to go with the latter, the maintenance costs of both the servers will be almost similar in the long run.
Disadvantages of Choosing an Unmanaged Server
- Much more responsibility with server administration
Since you need to deal with all the aspects of server maintenance and the software/applications installed in it, it requires a significant amount of time and effort to maintain the smooth functioning of the server. You’re also responsible for protecting the server and all the sensitive data residing in it from cyberattacks and hackers.
This essentially means you won’t be able to focus fully on your business’s operations when you choose an unmanaged server. If you want to make the server more user-friendly by adding third-party software/applications to it, you’ll also need to do them yourself.
- Minimum technical support
Regardless of the hosting provider you take the unmanaged server from, you’ll get basic technical support, but nothing more than that. Although this support remains included in your contract, this sometimes falls short due to the complex nature of server administration.
It’s important to note that while all hosting providers offer a great deal of additional technical support, it comes at a hefty price. If you have an unmanaged server and you run into problems with it, you should be prepared to pay a significant service charge when seeking add-on technical support from your hosting provider.
Final Verdict: Managed Vs. Unmanaged Dedicated Server
As you can see, just purchasing a dedicated server isn’t enough to ensure the smooth functioning of your server. You need to take a step ahead by determining if your business requires a managed server or an unmanaged one. As we’ve seen above, the notable differences between a managed and unmanaged server start with the entity managing the server.
Fundamentally, if you want to have a more convenient but more expensive hosting option where all the tasks are managed by the experienced professionals of the hosting provider, you should go with a managed server.
However, if you have robust technical knowledge of server administration and other related tasks or a team to deal with them, you can always choose an unmanaged server. No matter which type of server you choose, it’s extremely important to partner with a reputable web hosting provider that can help you experience a hassle-free transition if you want to upgrade from an unmanaged server to a managed one.
As the credibility of the hosting provider matters a lot in the context of dedicated server hosting, you need to be careful about choosing the right things. Now that you know the final verdict of the managed vs. unmanaged server battle, it’s your time to take the final call.
Start by defining your exact requirements and then evaluate your or your team’s technical expertise in terms of carrying out server administration. Remember to take into account the significant amount of time you or your team will need to spend on those activities. Once you get a clear comprehension of these aspects, you should be able to make a well-informed decision regarding whether you should go with a managed server or an unmanaged one.