

How to Install WordPress on cPanel
With more than 455 million websites running on it, WordPress has become one of the sought-after CMSs (content management systems) across the globe. Since its inception in 2003, WordPress has rapidly outgrown its actual purpose of building a blog to WordPress specialized web hosts and almost countless plugins.
Today, WordPress is the backbone of many different things, from simple, personal blogs to large, complex websites.
If you’re planning to start a WP site, first, you need to choose a hosting account that supports WordPress. People commonly choose from cpanel shared hosting and dedicated cPanel hosting when it comes to running a WordPress site.
This is simply because cPanel is one of the most user-friendly, flexible, and secure control panels that let users manage all their hosting-related tasks from a centralized location with ease.
In this beginners guide 2022, we’re going to show you how to install WordPress on cPanel. There’re two options to do it: automatic installation and manual installation. If your web host offers an automatic script installer, you can choose the automatic installation. Or else, you can install WordPress on cPanel using the manual installation process.
How to Install WordPress on cPanel Using an Automatic Script Installer(Softaculous)
While there’re several automatic script installers available out there, Softaculous is the one commonly offered by most hosting service providers.
Here’re the detailed steps you need to follow to set up WordPress on cPanel using Softaculous.
1. Log In To The cPanel Account
First, log in to your cPanel account utilizing the username and password that your web host provided you with when you created an account with it.
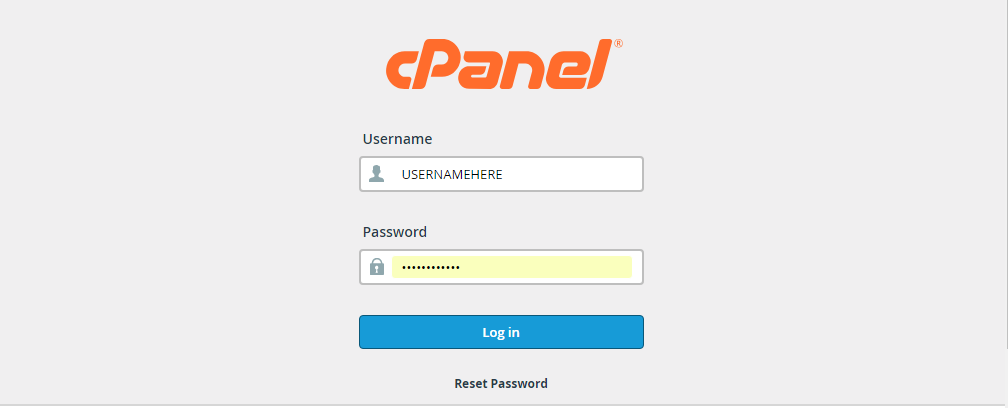
*Image Source: https://hostadvice.com/how-to/how-to-install-wordpress-from-cpanel/
2. Find Softaculous Apps Installer
After you’ve logged in, you need to locate Softaculous Apps Installer using the cPanel dashboard. In the search box that helps you locate functions, type “Softaculous” to find it. It’ll be displayed along with all apps supported by it.
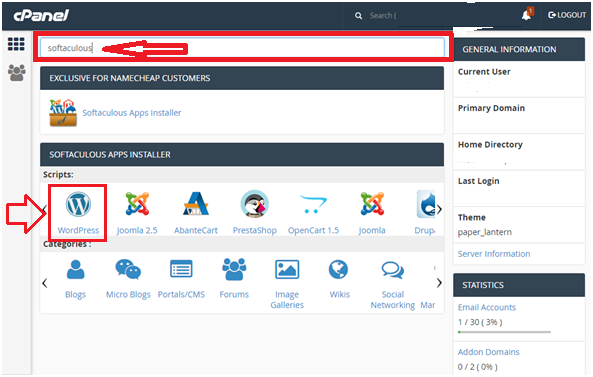
*Image Source: https://hostadvice.com/how-to/how-to-install-wordpress-from-cpanel/
As shown in the above image, you’ll see WordPress under “Scripts.” Click on it and move on to the next step.
3. Select Your Protocol and Domain Name
This screen will appear with a small description of the version of WordPress that you’re going to install. Click on the blue button, namely “Install.” Here, you’ll get two options: Quick Install and Custom Install. Select “Quick Install.”
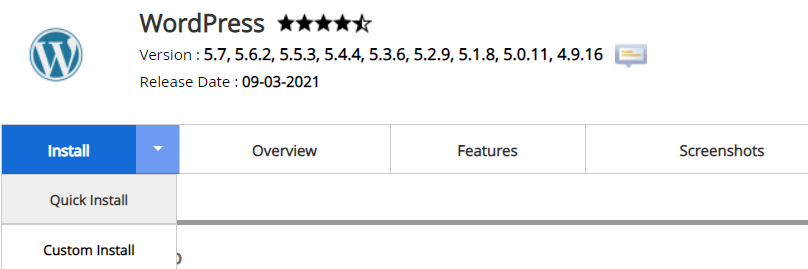
*Image Source: https://colibriwp.com/blog/install-wordpress-cpanel/
You’ll be directed to the page, namely “Software Setup” as shown in the below image.

*Image Source: https://hostadvice.com/how-to/how-to-install-wordpress-from-cpanel/
On this page, first, you need to choose one protocol from “https://www.” “http://www.” If your domain has an SSL certificate, then only choose https://www.
Then select your domain in the box below. If you want to use a subfolder under which WordPress will be installed, mention it in the “In Directory” box. Or else, leave it blank.
4. Enter Details of Your WordPress site
In this step, you’ll need to fill in the details of your WordPress site as shown in the below image.
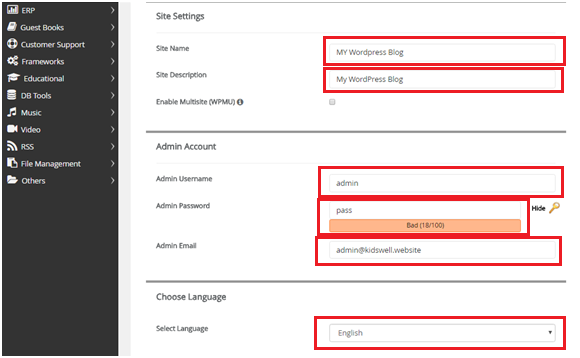
*Image Source: https://hostadvice.com/how-to/how-to-install-wordpress-from-cpanel/
First, enter your site’s name along with a short description. In the “Admin Account” section, enter username, password, as well as an email address. Note that you’ll need to use these credentials to enter your WordPress admin panel and hence, select a strong password. Then select the language you wish to use and proceed to the next step.
You can choose from a large number of languages to be used for WordPress. If you want to modify the language selection later, visit the “General” page under “Settings” in your WordPress admin panel to do so.
5. Select Plugins (Optional) and a Theme
On this screen, you’ll get an option to install some plugins, but it isn’t mandatory. Then you need to select your preferred theme. If you don’t choose a theme, the default one will be automatically installed.
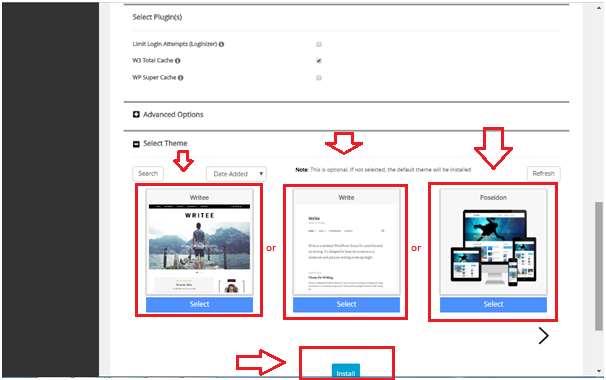
*Image Source: https://hostadvice.com/how-to/how-to-install-wordpress-from-cpanel/
Finally, click on the “Install” available at the bottom of the page.
Softaculous will automatically check the information you submitted and set up WordPress on cPanel.
How to Install WordPress on cPanel Manually
Although the manual cPanel WordPress installation takes a little more time than automatic installation, the process is quite straightforward.
Here’re the steps involved in how to install WordPress on cPanel manually.
1. Get WordPress
First, visit the WordPress website and download the latest version available. Once the zip file is downloaded, save it to your computer.

Go to the directory of the zip file and extract the whole archive. Write down the location of the content. After the WordPress installation archive is extracted, delete the zip file.
2. Log In To Your cPanel Account
Now, log in to your cPanel account using your credentials. To find your cPanel account, browse your_domain_name.com/cpanel.

*Image Source: https://www.servermania.com/kb/articles/cpanel-wordpress/
3. Create a Database
Under “DATABASES,” you’ll find MySQL Databases Wizard.

*Image Source: https://www.servermania.com/kb/articles/cpanel-wordpress/
Type a name for your WordPress database and hit “Next Step” as shown in the below image.
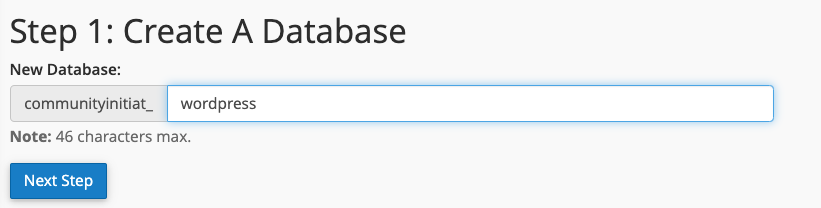
*Image Source: https://www.servermania.com/kb/articles/cpanel-wordpress/
Now, click “Create User” after entering your username and password.
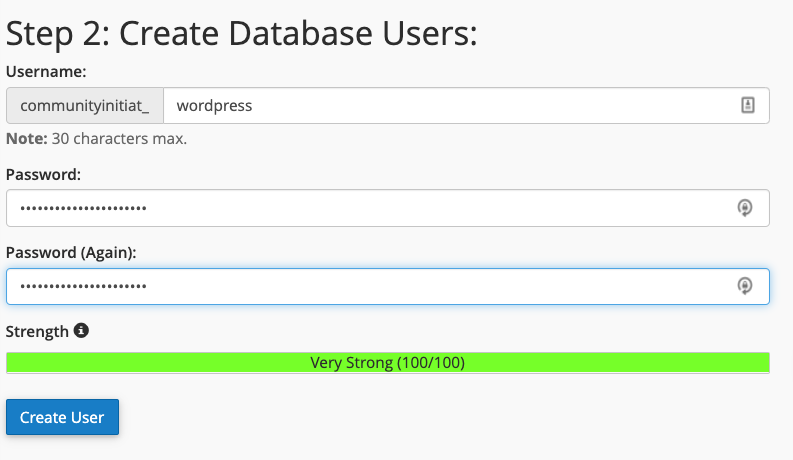
*Image Source: https://www.servermania.com/kb/articles/cpanel-wordpress/
Assign appropriate permissions to the user by clicking “Make Changes.”
To check whether it has been done correctly, go back and view current databases. There needs to be one with a user assigned to it.
4. Upload WordPress Install Script
In cPanel, visit the “File Manager” and click on the public_html directory.

*Image Source: https://www.servermania.com/kb/articles/cpanel-wordpress/
There’re two options where you can store your WordPress site.
The first one is your domain’s root directory, and the second one is a subfolder of your domain. With the first option, all your WordPress files and subfolders will stay in public_html. If you choose the latter option, rename the WordPress folder according to your preference.

*Image Source: https://phoenixnap.com/kb/how-to-install-wordpress-in-cpanel
On the “File Upload” screen, select all the extracted files to upload them.
5. Start WordPress Installation Process
In your browser, go to your domain. If the domain is accurately pointed to the server, you should see the WordPress install page here. Hit the “Let’s go!” button as shown in the below image.
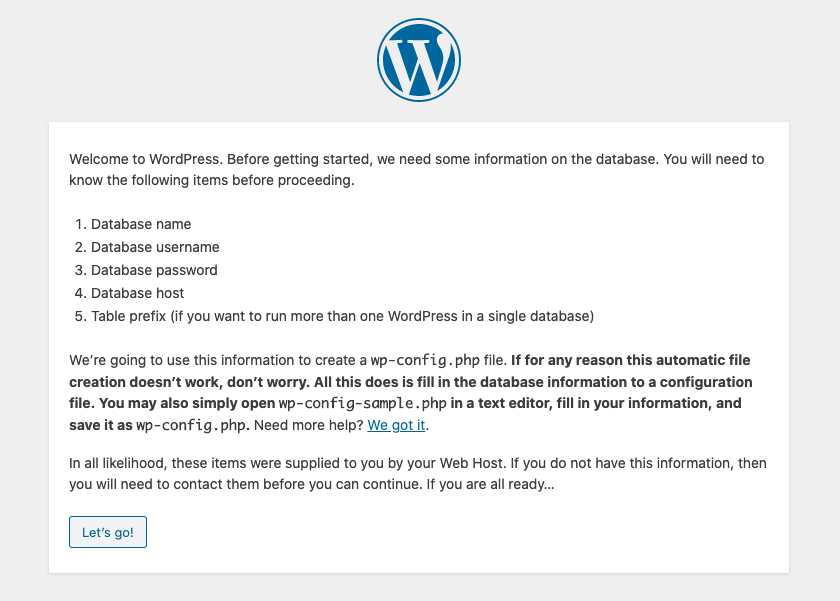
*Image Source: https://www.servermania.com/kb/articles/cpanel-wordpress/
Then you need to type the details of the database you created earlier. The pieces of information you need to enter here include:
- Database name
- Your username for the database
- Your password for the database
- Database host
After the database connection details are entered, click the “Submit” button. Then hit the button, namely “Run the installation.”
On the following screen, you need to enter your admin credentials (username and password) that you’ll be using to manage your site. Once these pieces of vital information have been entered, hit the “Install WordPress” button as shown in the below image.

*Image Source: https://www.servermania.com/kb/articles/cpanel-wordpress/
It’s crucial to note that the username and password you’ll need to enter in the above screen are for WordPress only. Therefore, don’t use the same credentials you used when creating the database user. If required, you can visit the “WordPress Admin” panel to change all of these pieces of information.
Upon completion of the installation process, you’ll be redirected to the login screen.
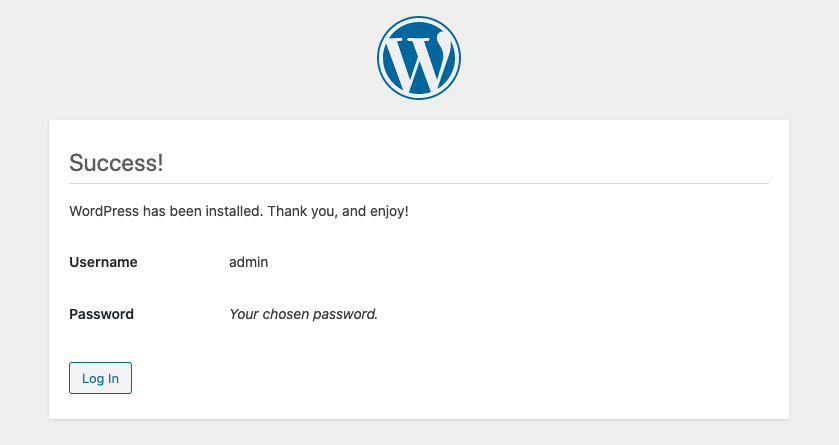
*Image Source: https://www.servermania.com/kb/articles/cpanel-wordpress/
Hit the “Log In” button to start working with WordPress.
Things You Can Do After Installing WordPress On cPanel
Now that you have a detailed knowledge of how to install WordPress on cPanel manually and using an automatic script installer, here’re the activities that users commonly carry out from cPanel with regard to WordPress.
1.Using cPanel File Manager
The cPanel File Manager lets you perform lots of things conveniently and quickly, from accessing the files of your WordPress site to resolving technical issues. The most common examples include:
- Removing or uploading plugins and themes manually
- Troubleshooting errors stopping you from accessing WP dashboard
- Incorporating custom code
The file manager contains a list of all the files that you’ve uploaded to the server via your hosting account. Your WordPress files are available under public_html folder.
2.Using phpMyAdmin from cPanel
Apart from WordPress files, your WordPress also has a database. You can edit the information stored in this database to add/remove user(s) from your site and solve issues.
Here, you need to use the database management tool, namely phpMyAdmin. You can find phpMyAdmin under “Databases” in your cPanel account. Under phpMyAdmin, you can find your database that you may edit or apply appropriate instructions to resolve issues.
How to Change your WordPress Password from cPanel?
To reset your WordPress password, phpMyAdmin can be used from cPanel. After accessing phpMyAdmin, visit the database of your site and edit the information pertaining to the relevant user. There, you can conveniently generate a new encrypted password for the user with the help of a few clicks.
Closing Thoughts
As you can see above, the process of how to install WordPress on cPanel is quite simple and straightforward. The process becomes even faster and simpler if you use an automatic script installer as you don’t need to create the database or download the WordPress files manually.
Once you’ve installed WordPress on cPanel, customize it according to your requirements and preferences. There’re thousands of WordPress themes (both free and paid) available that you can choose from to give your WordPress site the exact appearance you want it to have.
And if you want to add more features to your site or expand its functionality, almost countless numbers of WordPress apps are available to help you accomplish that.


